
Below you’ll find a real quick video tutorial I’ve put together for you. In less than 5 minutes, you’ll learn how to add an image to the sidebar in WordPress, Please watch the video and follow the steps, and you’ll be on your way!
How To Add An Image To The Sidebar In WordPress:
First you’ll want to sign into your WordPress site. From your dashboard, click on “Post” then on “Add New.” We’re going to use this post to save all of our future sidebar pictures. This way you’ll have easy access to all the pictures you’ll want to add or take away from your sidebar, sometime down the road.
Now that you’re in a New Post, give it a title. Something that explains what it is. In this case we’ll title it “Sidebar Photos.”
Now go down to the area where you’d write your content, and give this particular picture you are about to add, a title. I’m going to be adding an “About Me” snippet to my sidebar with a picture of myself in this video. So for this instance I will title the picture “About Me.”
Click the return button so your curser is now under your new title. Now move yourcursor over the “Add Media” button and click.
From here you will either find a picture you have already uploaded to WordPress, or you will Upload a File. Once you have the picture uploaded, go to the lower right corner and click the blue “Open” button. Highlight that photo on the next screen (if it isn’t already) and click “Insert to Post.”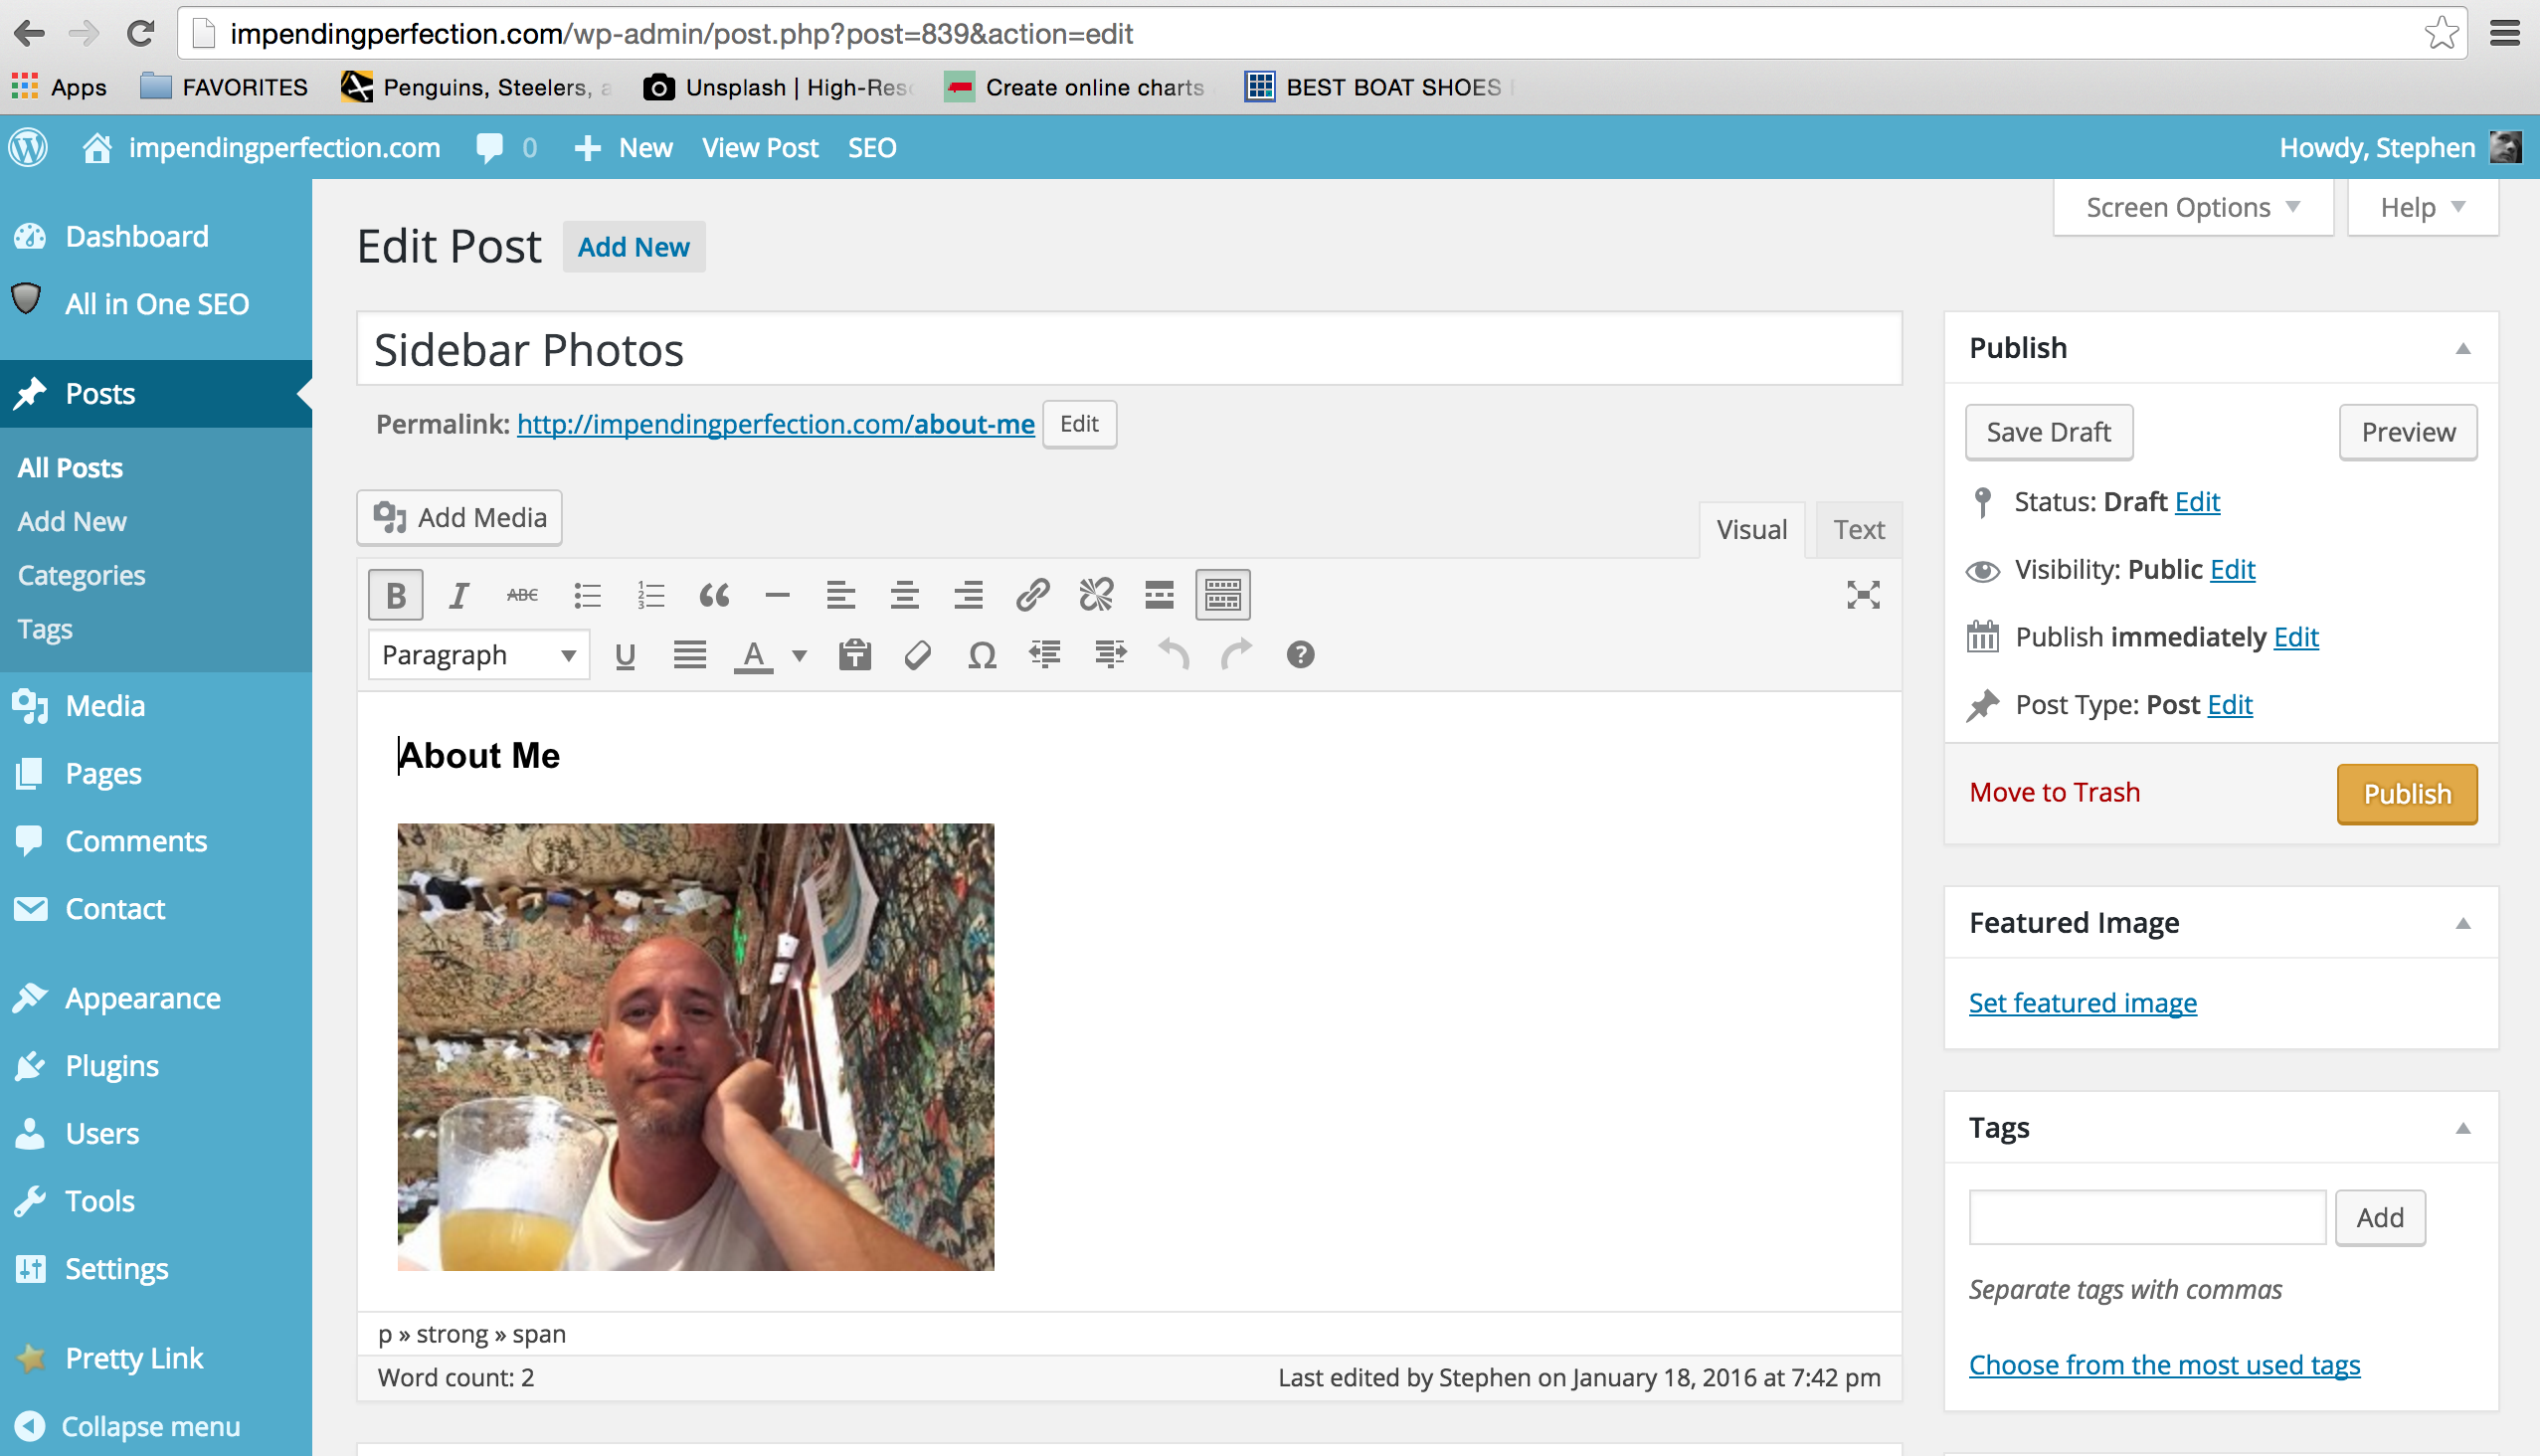
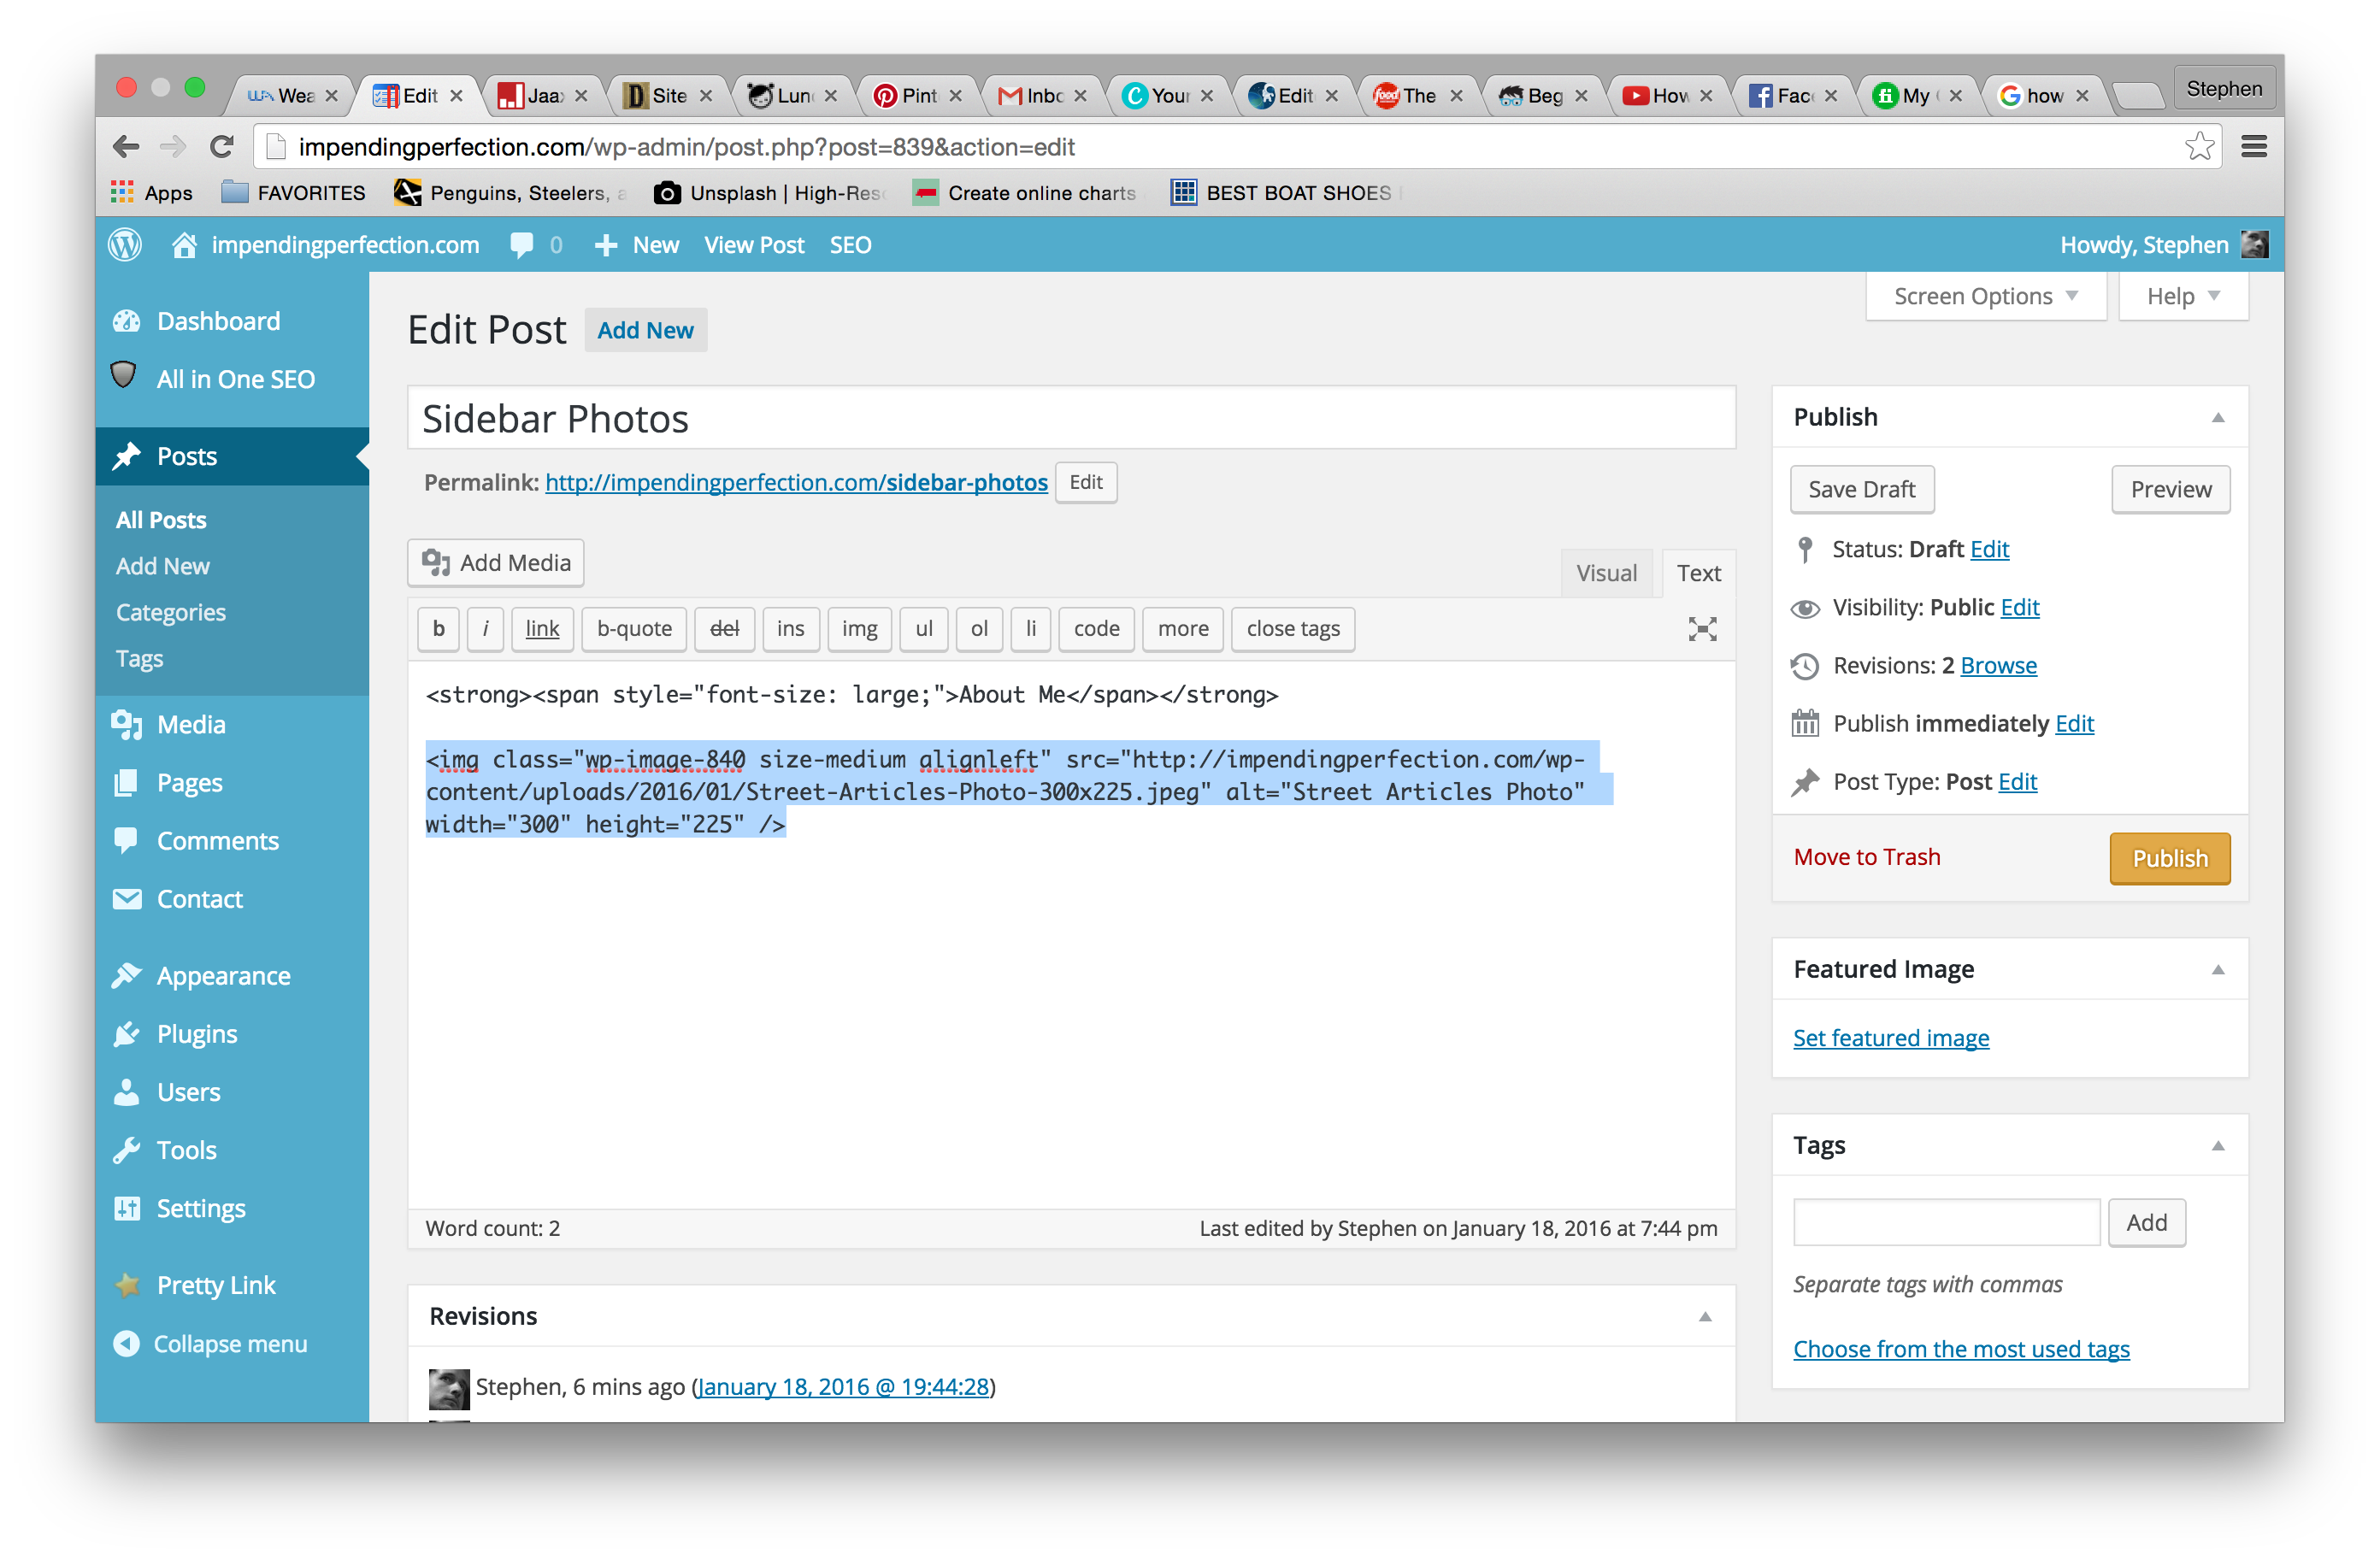
You should now see your photo. Now take your cursor and hover over the “Text” tab located next to the “Visual” tab. Here you will find the html code for the picture you have just inserted.
Go ahead and highlight that code and click copy.
Now go back to the visual tab and then click “Save Draft.” You won’t ever want to “Publish” this post. This is simply for your own use, where you can store all your sidebar pictures.
Once you’ve saved as draft, move to the sidebar on the left, and hover your cursor over “Appearance” and then click “Widgets.”
Here is where you’ll find the back office for your sidebar. Scroll down until you see “Text” and then click and hold. Now drag that text box in the position you’ll want it in your sidebar.
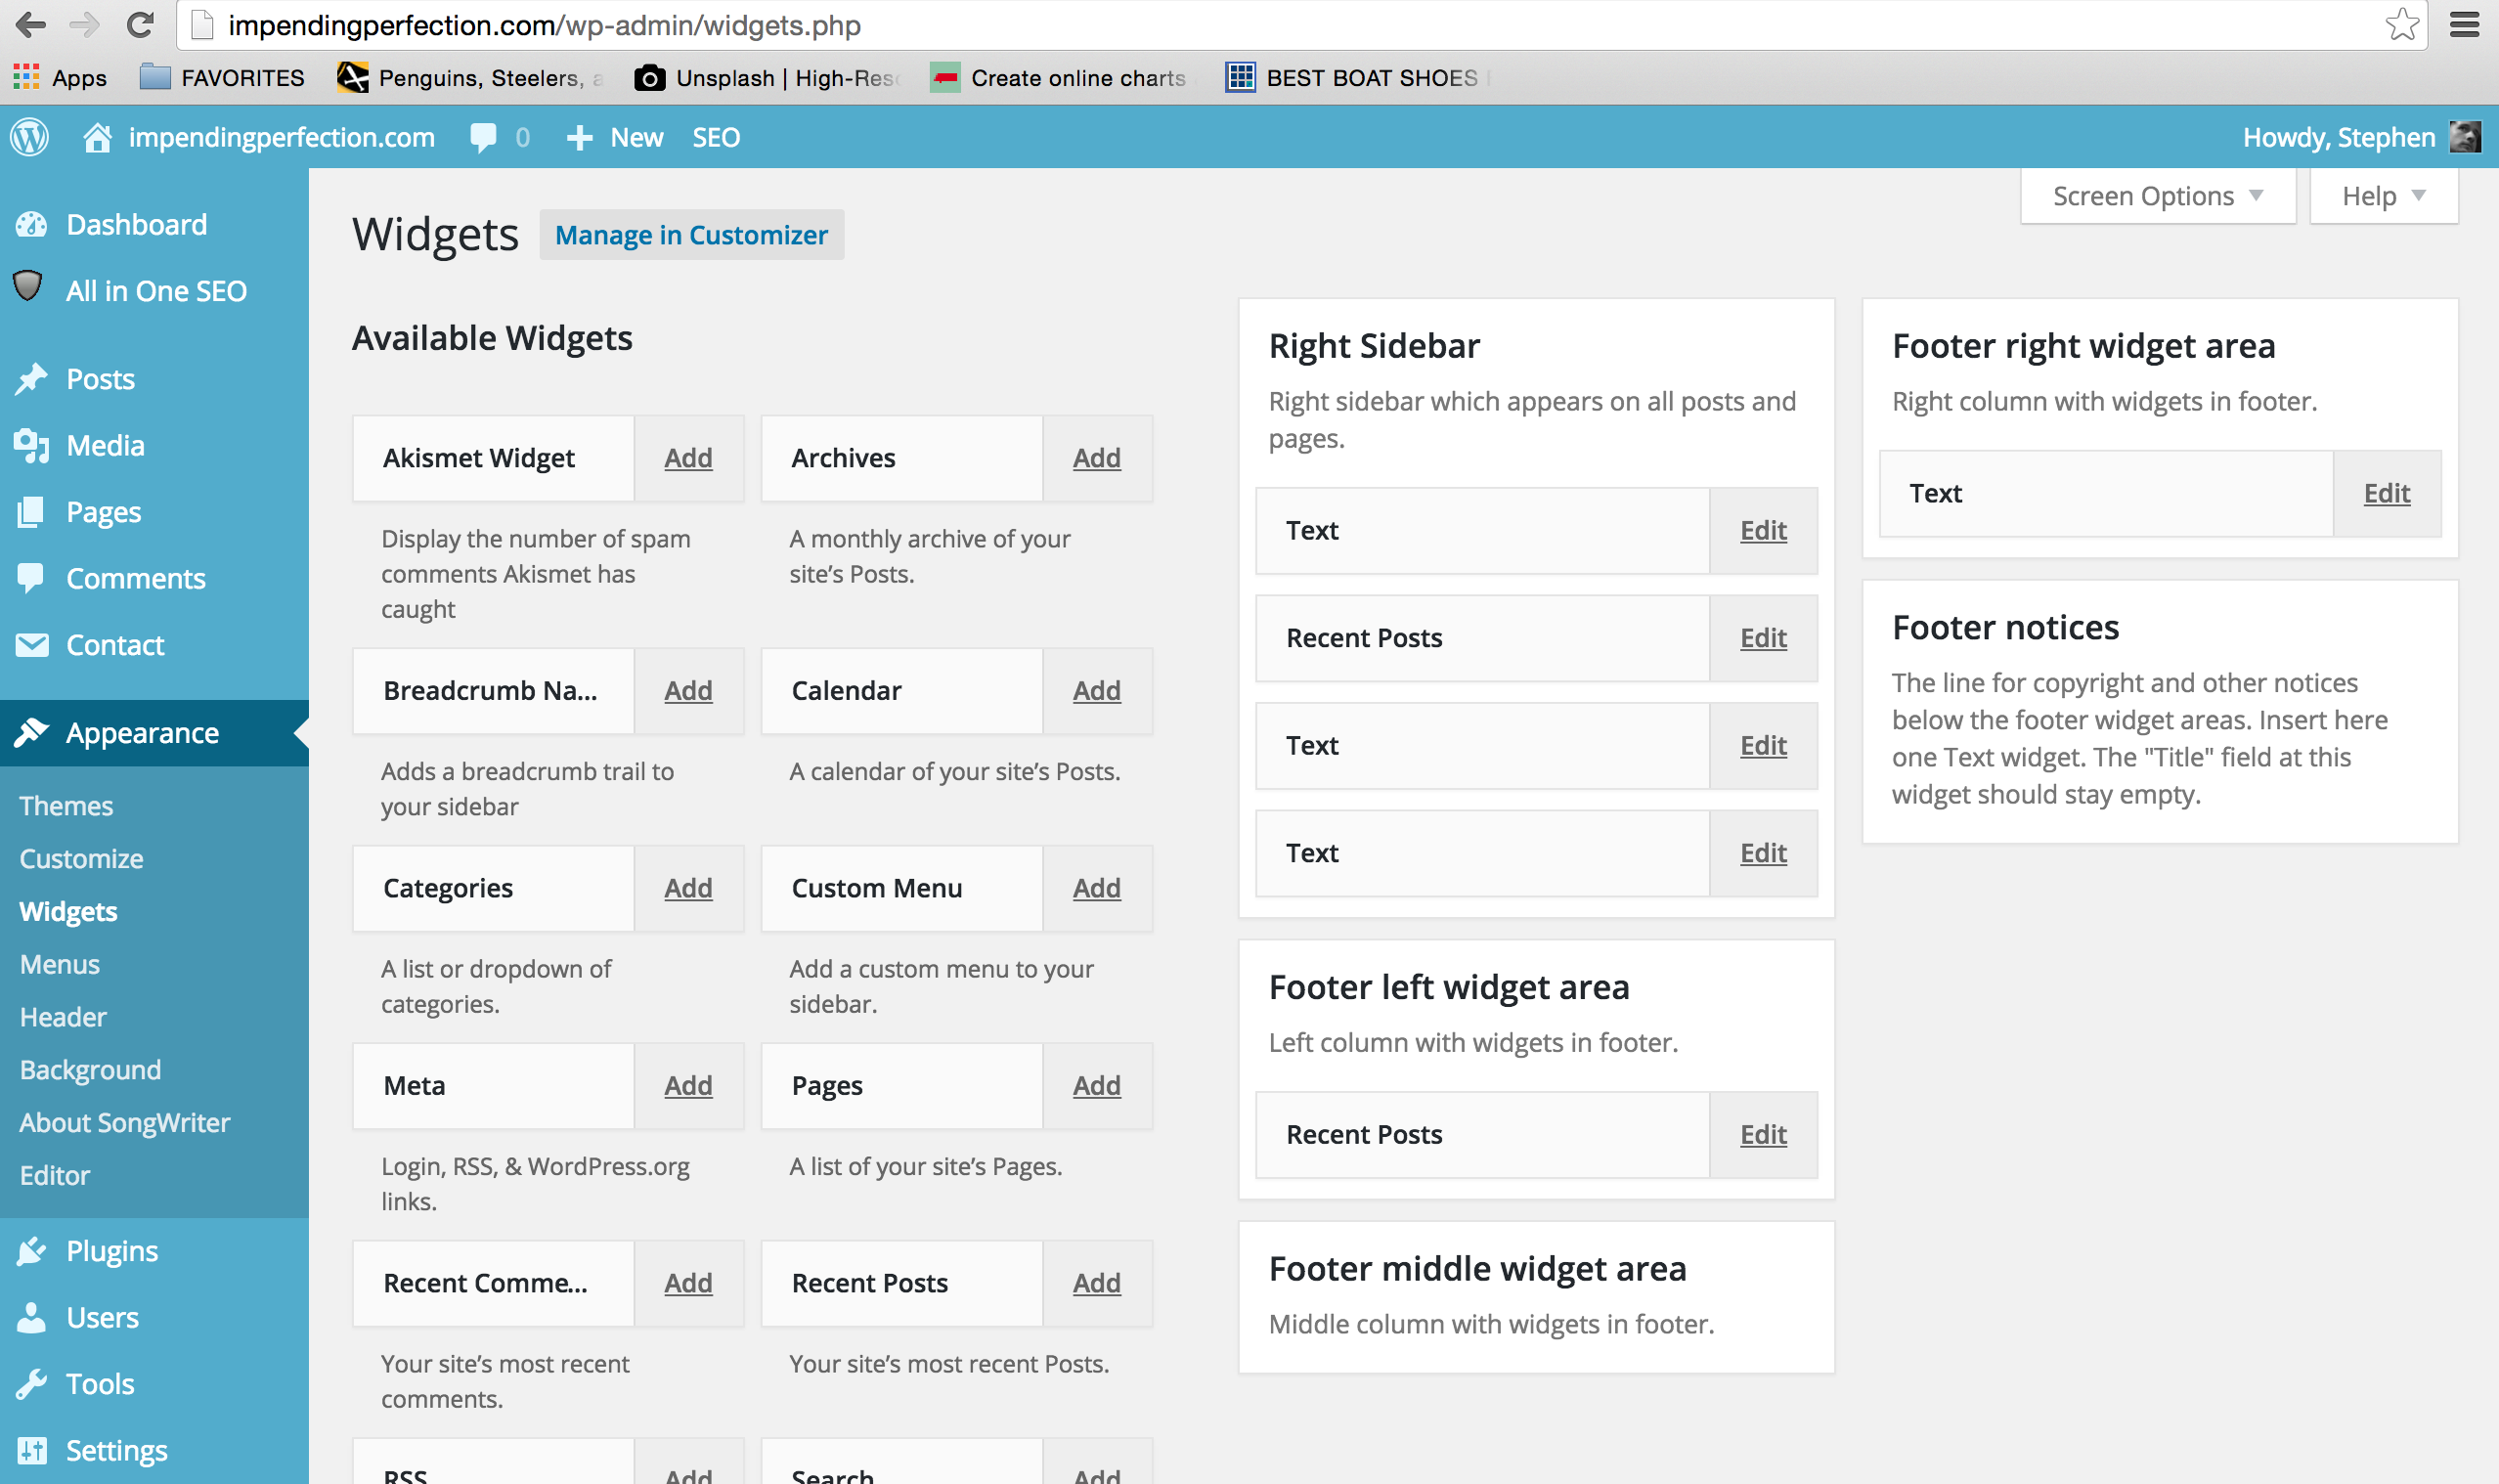
Give it a Title. In this case “About Me.” Now where it says “Content” go ahead and paste that code we just coppied for your picture. At this point you can write a few short sentences about yourself.
Click “Save.”
Congratulations, you did it! Go visit your site and check out your accomplishment! That’s how to add an image to the sidebar in WordPress. No sweat!
If you found this video helpful, please share it with your favorite social sites. And I’d love to hear about it in the comment section below! If you have any questions, don’t hesitate to ask. I’ll answer within 24 hours!
Everything I’ve learned about how to make money online, I’ve learned by using the Wealthy Affiliate Platform


